If your current system is the Windows Home edition and you want to upgrade to the Windows Professional edition, please purchase a Windows 10 Professional key or a Windows 11 Professional key. After upgrading using the method below, activate the system with the purchased key.
A.Handle through Microsoft's official methods
Click link https://support.microsoft.com/en-us/windows/upgrade-windows-home-to-windows-pro-ef34d520-e73f-3198-c525-d1a218cc2818
Microsoft Store Upgrade:Upgrade to Windows 11 Pro using Microsoft Store Upgrade to Windows 10 Pro using Microsoft Store
B.After upgrading through the public upgrade key : VK7JG-NPHTM-C97JM-9MPGT-3V66T, activate it using the purchased key
1. Press Windows Key  + I keys to open Settings app.
2. Go to System > Activation.
3. Under Upgrade your edition of Windows, click on Change for Change product key.

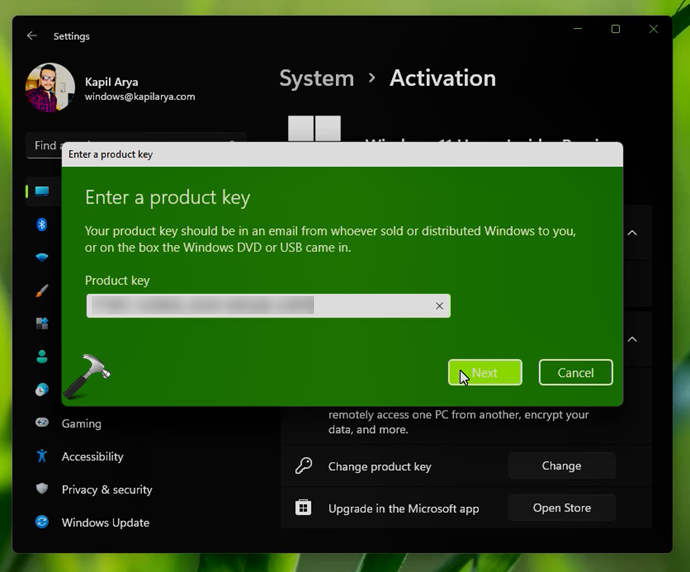
4. After this, there will be a pop-up to Enter a product key. Type in your Windows 11 Pro genuine product key and click Next.
🛈 If you’ve bought Pro upgrade from Microsoft Store already but your edition is still Windows 11 Home, you can instead type Pro edition generic key VK7JG-NPHTM-C97JM-9MPGT-3V66T. The generic key is usually used to switch to Pro edition. The Pro edition will be automatically activated as you connect to Internet.
How to upgrade Windows 11 Home to Pro
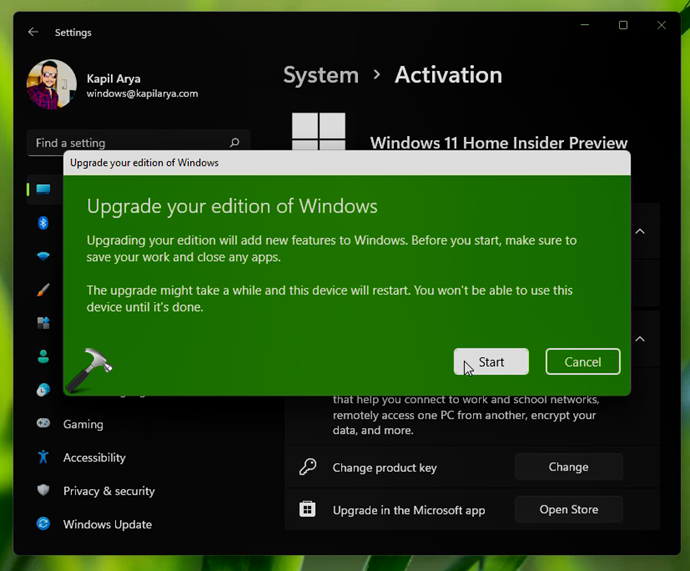
5. Under Upgrade your edition of Windows, click on the Start button.
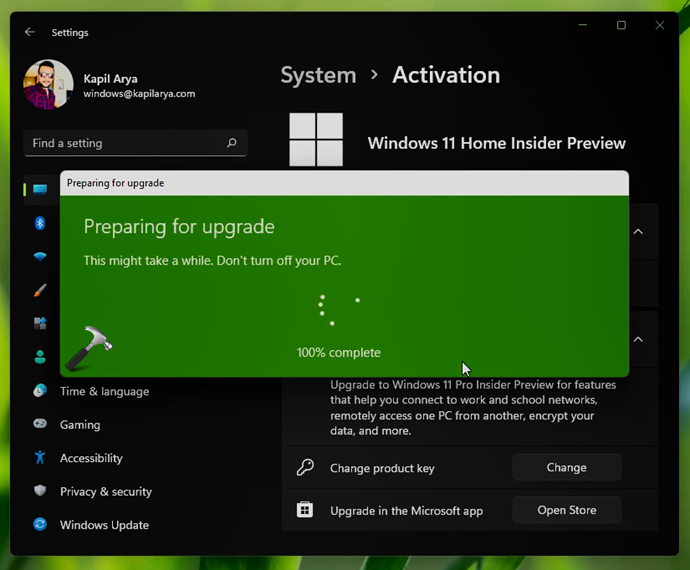
6. Next, let the Preparing for upgrade screen completed to 100%.
7. Once the Preparing for upgrade screen is completed to 100%, your system is expected to restart. However if that doesn’t happens, you have to manually restart after the Unable to upgrade your edition error.
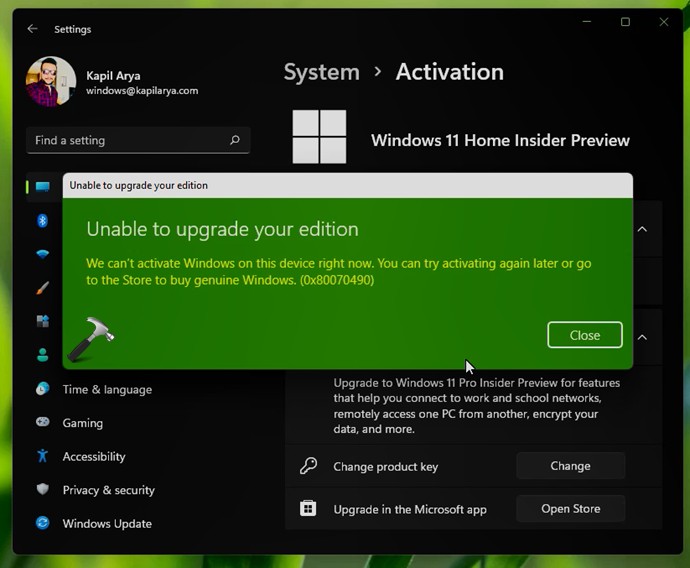
8. So close the error and Settings app and restart your system.
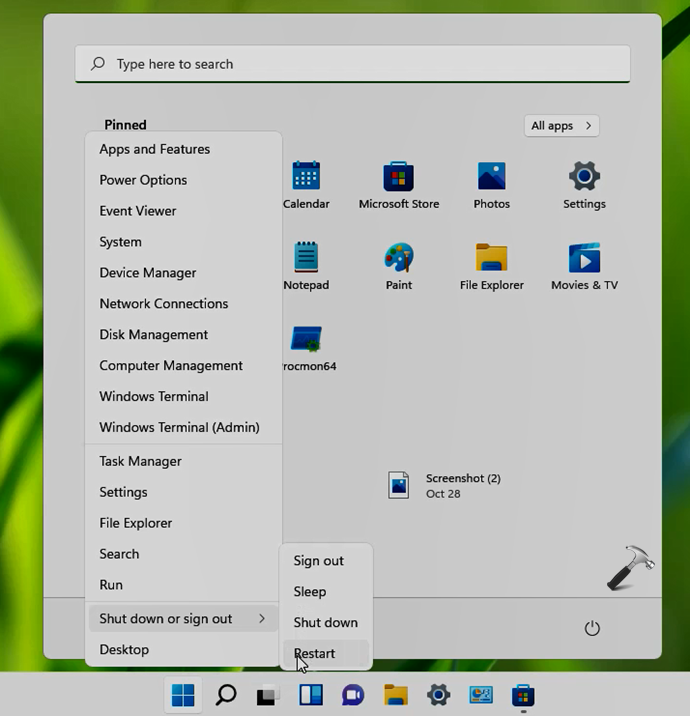
9. During restart, you will be seeing some screens where features are being added. Your system will now restart for the first time.

10. After restart, you will be seeing Adding features screen, which should be completed to 100%. Your system will now restart for the second time.

11. After the second restart, your system should be finally upgraded to Windows 11 Pro. You can confirm this from Settings app > System > Activation.
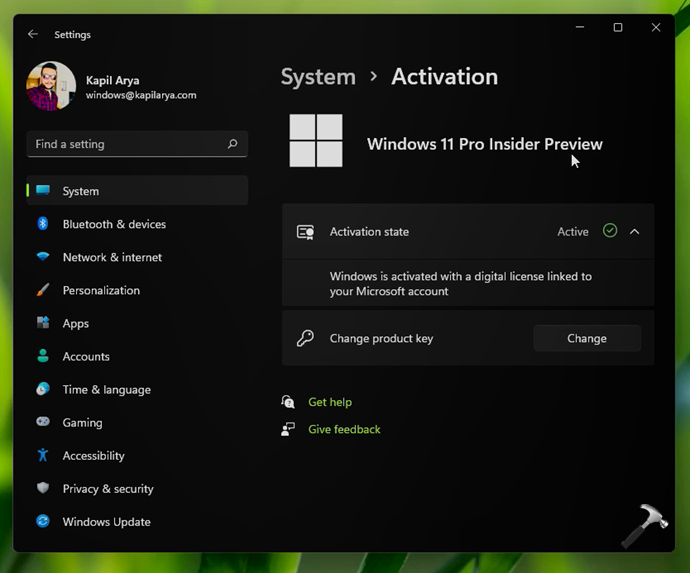
So in this way, your system is now upgraded to Windows 11 Pro and is activated with the genuine product key you’ve provided in step 4.
At this point, click on 'Change Key' again and you will be able to activate using the key you purchased
 English
 Français (French)
 Deutsch (German)
 Español (Spanish)
 Italiano (Italian)
 Nederlands (Dutch)
 Português (Portuguese)
 العربية (Arabic)
 हिन्दी (Hindi)
 日本語 (Japanese)
 Hrvatski (Croatian)
 Ελληνικά (Greek)
 Română (Romanian)
 Čeština (Czech)
 Српски (Serbian)
 Tiếng Việt (Vietnamese)
 🇮🇱 עברית (Hebrew)
 Български (Bulgarian)
 Svenska (Swedish)
 Dansk (Danish)
 Norsk (Norwegian)
 Suomi (Finnish)
 Polski (Polish)
 Bahasa Melayu (Malay)
 Slovenčina(Slovenská Republika)
 Magyar(Magyarország)
 中文(简体)